
Easter Nails: A Step-by-Step Tutorial for Adorable Festive Designs
20/01/2025 · Updated on: 14/01/2025

Easter is a time of celebration, renewal, and, of course, creativity! One of the best ways to show off your holiday spirit is through Easter-themed nails.
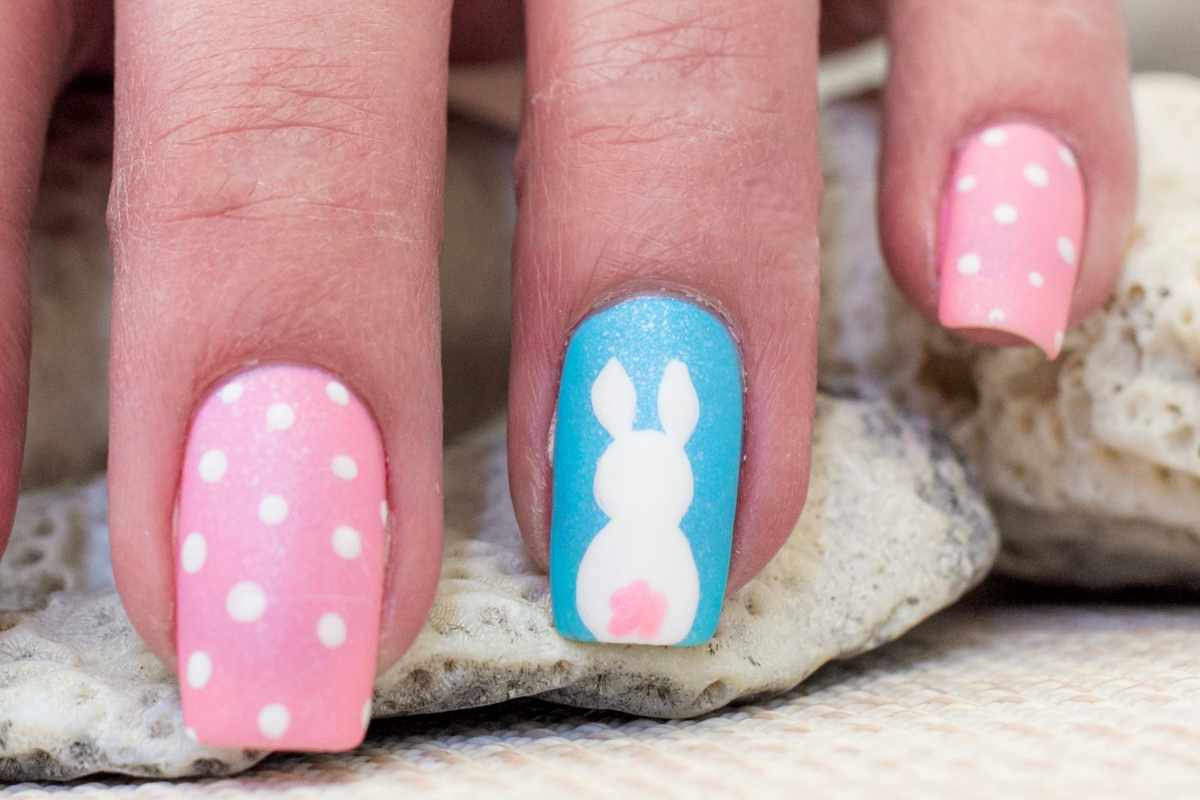
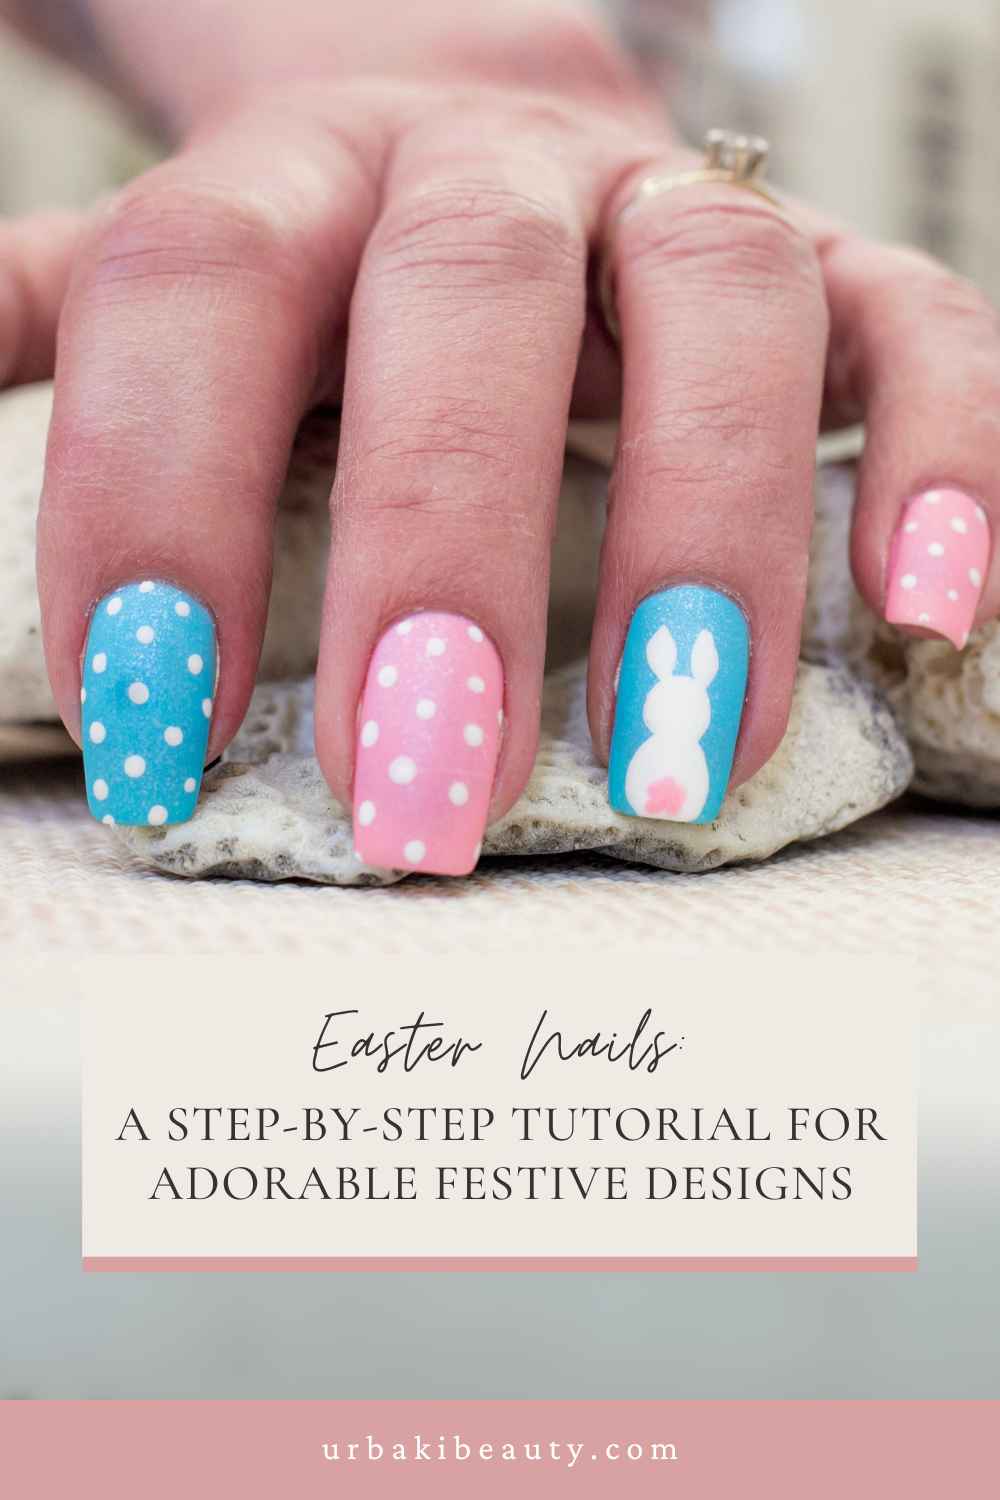
This particular design features soft pastel shades, playful polka dots, and an adorable bunny accent nail, making it the perfect choice for Easter gatherings or just adding a festive touch to your look.
Creating these charming nails at home is easier than you might think. In this tutorial, we’ll guide you through every step to achieve these delightful Easter nails.
Why Choose Easter-Themed Nails?
Easter nail designs are not only fun and festive but also a great way to embrace the cheerful vibes of spring.
This particular style stands out because of its combination of pastel pink and blue hues, complemented by whimsical polka dots and a cute white bunny.
What Makes This Design Special?
- Playful and Cheerful: The bright pastel colors and patterns scream springtime joy.
- Beginner-Friendly: With simple patterns like polka dots and a bunny silhouette, this design is perfect for all skill levels.
- Customizable: You can swap out colors or add extra details to make it uniquely yours.
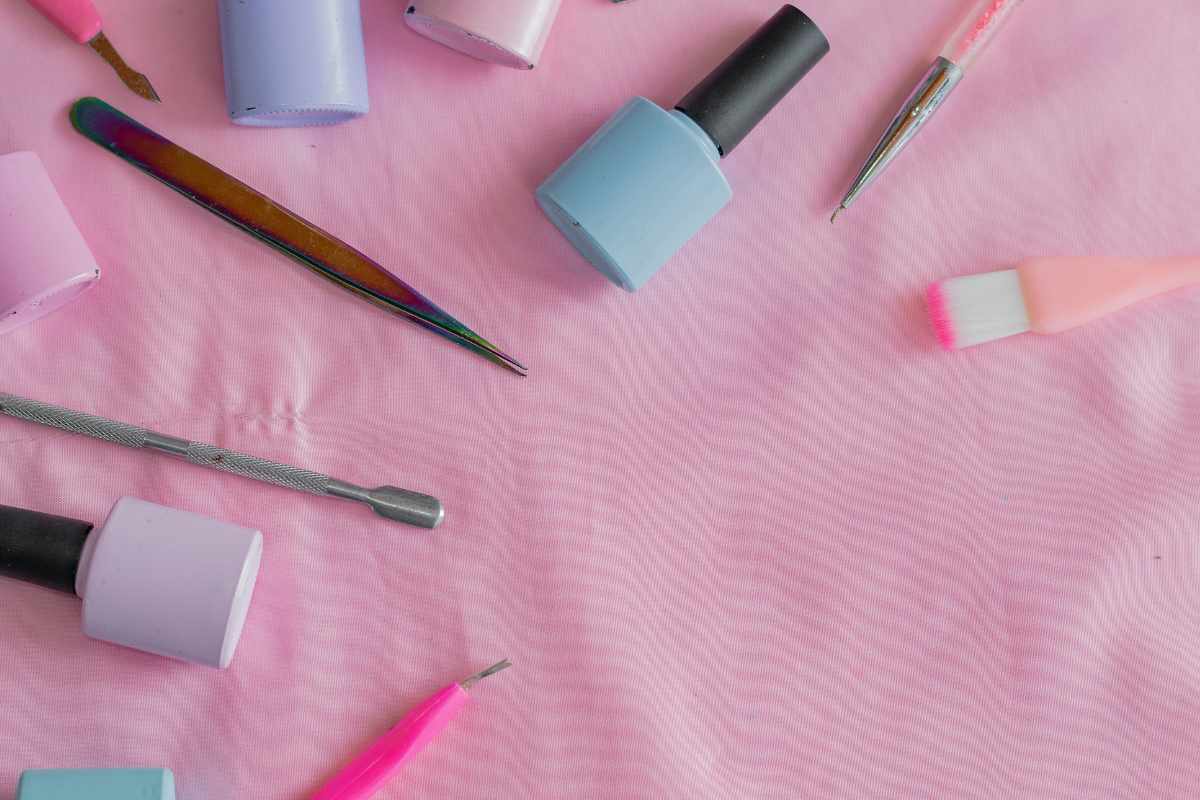
What You’ll Need for Easter Nails
Before starting, gather all the tools and supplies needed to create these adorable nails. Having everything ready ensures a smooth and enjoyable process.
Essential Tools and Supplies
- Nail Polish Remover and Cotton Pads: To clean your nails and remove old polish.
- Nail Clippers and File: For shaping your nails to your preferred length and style.
- Cuticle Pusher or Stick: To create a clean nail bed.
- Base Coat: Provides a smooth foundation and helps prevent staining.
- Pastel Pink Nail Polish: For the base color on some nails.
- Pastel Blue Nail Polish: For the base color on other nails.
- White Nail Polish: For the bunny design and polka dots.
- Dotting Tool or Toothpick: To create precise polka dots.
- Nail Art Brush or Fine Detail Brush: For drawing the bunny silhouette.
- Topcoat: Adds shine and protects the design.
- Small Clean-Up Brush or Cotton Swabs: For fixing any mistakes.
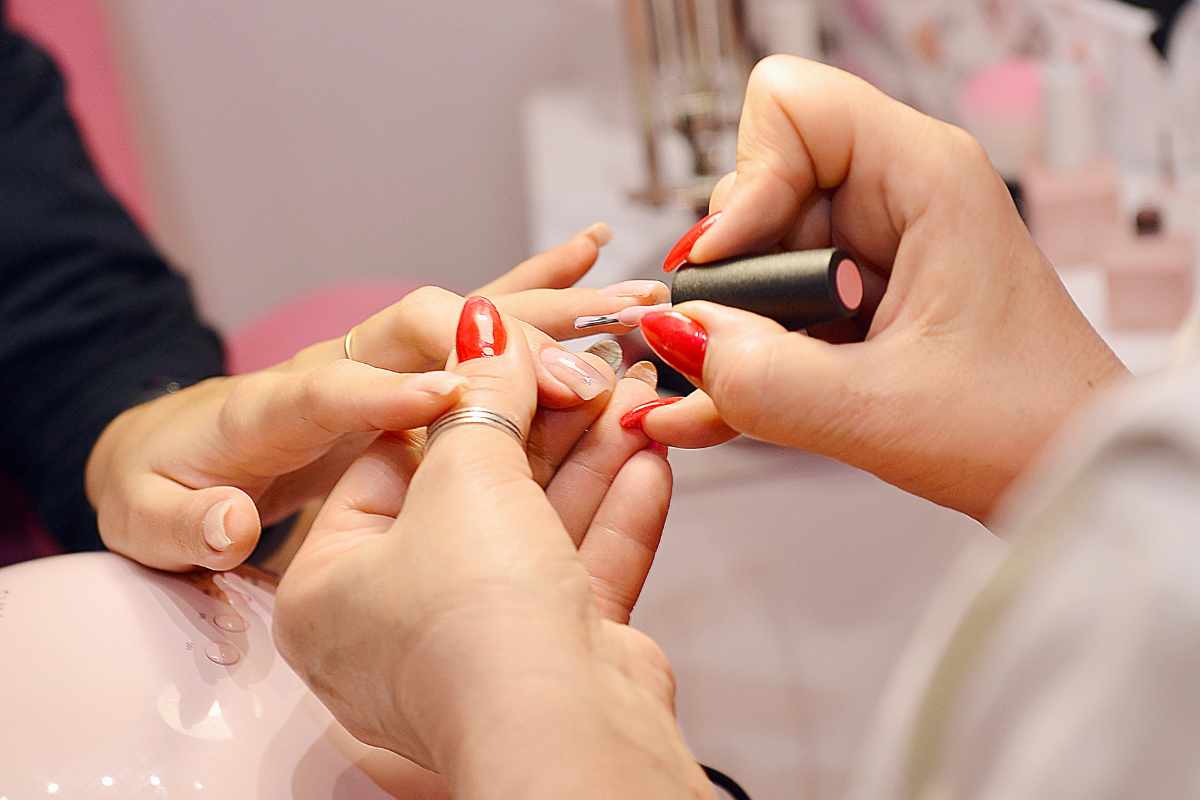
Step 1: Prepare Your Nails
Preparation is key to achieving a flawless manicure. Begin by removing any old nail polish with a nail polish remover. Trim and file your nails to your desired shape—square or oval shapes work well for this design.
Focus on Your Cuticles
Gently push back your cuticles using a cuticle pusher or stick. This step ensures a clean canvas for your design and helps the polish last longer. Avoid cutting your cuticles unless necessary.
Step 2: Apply the Base Coat
A base coat is essential for protecting your natural nails and ensuring a smooth application of polish. Apply a thin, even layer to all your nails and let it dry completely.
Why This Step Is Important
- Prevents staining from the bright pastel colors.
- Creates a smooth surface for even polish application.
- Helps the manicure last longer without chipping.
Step 3: Paint the Base Colors
For this design, alternate between pastel pink and pastel blue polishes on your nails. The soft hues are perfect for Easter and provide a cheerful backdrop for the bunny and polka dots.
Tips for a Smooth Finish
- Apply thin layers to prevent streaking.
- Let each coat dry before applying the next to avoid smudging.
- Typically, two coats are enough for a vibrant, opaque finish.
Step 4: Add Polka Dots
The polka dots add a playful touch to this Easter design. Using a dotting tool or the tip of a toothpick, create white polka dots on the nails painted in pastel pink and pastel blue.
How to Achieve Perfect Polka Dots
- Dip the tool into white polish and gently press it onto the nail, spacing the dots evenly.
- Don’t overload the tool with polish to avoid smudges.
- Allow the dots to dry completely before moving on.
Step 5: Create the Bunny Accent Nail
The bunny accent nail is the centerpiece of this design and adds a touch of Easter charm. Select one nail (typically the ring finger) as your accent nail.
How to Draw the Bunny
- Use a fine nail art brush or detail brush dipped in white polish.
- Start by creating a small, round circle for the bunny’s head at the base of the nail.
- Add two elongated ovals on top of the circle for the bunny’s ears.
- Let the white polish dry completely.
- Optionally, add a small pink dot in the center of the bunny’s ears for added detail.
Pro Tip for Precision
If you’re worried about freehanding the bunny, use a nail sticker or stencil for a more uniform design.
Step 6: Clean Up Edges
After completing the designs, use a small clean-up brush or a cotton swab dipped in nail polish remover to tidy up any excess polish around the edges of your nails. This step ensures a polished and professional-looking finish.
Step 7: Apply a Topcoat
Seal your design with a high-quality topcoat. This not only protects your Easter nails from chipping but also adds a glossy finish that enhances the pastel colors and details.
How to Make It Last Longer
- Apply the topcoat in thin layers to avoid smudging the design.
- Don’t forget to seal the edges of your nails for extra durability.
- Reapply the topcoat every few days to keep your nails looking fresh.
Customizing Your Easter Nails
While this tutorial focuses on pastel pink, blue, and white designs, you can customize your Easter nails to make them uniquely yours.
1. Try Different Colors
Experiment with other pastel shades like lavender, mint green, or yellow for a more colorful palette.
2. Add Glitter
Incorporate a touch of sparkle by applying a glitter topcoat over one or two nails.
3. Include More Designs
Add other Easter-themed details like eggs, flowers, or tiny chicks to enhance the festive vibe.
Maintaining Your Easter Nails
To keep your nails looking fresh throughout the Easter season, follow these maintenance tips:
- Moisturize Regularly: Use hand cream and cuticle oil to keep your nails and skin hydrated.
- Avoid Harsh Activities: Wear gloves when cleaning or using harsh chemicals.
- Touch Up When Needed: Fix minor chips or fading by reapplying polish and a fresh layer of topcoat.
Why These Easter Nails Are Perfect for the Season
This design captures the playful and joyful spirit of Easter while remaining elegant and easy to achieve.
The combination of soft pastel colors, polka dots, and a bunny accent nail is both festive and charming, making it an excellent choice for celebrating the holiday.
What Makes This Design Stand Out
- It’s versatile and works well for all nail shapes and lengths.
- The polka dots and bunny are simple yet effective in conveying the Easter theme.
- It’s beginner-friendly, allowing anyone to achieve a salon-worthy manicure at home.
Final Thoughts
Easter nails are a delightful way to celebrate the holiday and show off your creativity. This pastel and bunny-themed design strikes the perfect balance between festive and stylish, making it suitable for all ages.
By following this tutorial, you’ll have the tools and confidence to create these adorable nails at home. So, gather your supplies, set aside some time, and enjoy the process of crafting your perfect Easter manicure.
With these cheerful nails, you’re sure to bring a smile to everyone you meet this season.
Happy Easter, and happy painting!
Did you find this post useful or inspiring? Save THIS PIN to your Beauty Board on Pinterest! 😊
You may also like