
How to Create Elegant Vintage Rose Nails Using Transfer Foil
25/05/2025 · Updated on: 15/05/2025

Vintage rose nail art is a timeless and elegant design that has captured the hearts of nail art enthusiasts worldwide.
One of the most popular techniques for creating this beautiful style is using full coverage transfer foil.
This method allows you to achieve intricate and seamless floral patterns that instantly elevate your nails, creating a sophisticated look.
In this article, we will explore how to master this technique and create stunning vintage rose nails, all while mentioning insights from the talented nail artist Dorota Palicka Nails, who has mastered the art of using transfer foil to perfection.
What is Full Coverage Transfer Foil?
Full coverage transfer foil is a nail art technique that involves applying a metallic or patterned foil over the entire surface of your nail.
Unlike traditional nail art methods, this technique allows for detailed patterns to be transferred easily and quickly.
Transfer foils come in various colors, textures, and designs, including floral patterns, which are perfect for creating vintage rose nail art.
The adhesive used in this process ensures that the foil stays in place, making it an easy and effective way to achieve a high-quality design.
Step-by-Step Guide to Creating Vintage Rose Nail Art
Now, let's break down the process of creating vintage rose nail art using full coverage transfer foil.
This guide will help you achieve a polished and elegant look, inspired by Dorota Palicka Nails, who is renowned for her expertise in foil transfer techniques.
Step 1: Prepare Your Nails
Before starting the design process, ensure your nails are clean and dry. Begin by pushing back your cuticles gently and trimming your nails to your desired length.
Buff the nail surface lightly to remove any ridges or unevenness. This creates a smooth canvas for the design and ensures better adhesion of the foil.
Step 2: Apply Base Coat
After preparing your nails, apply a thin layer of base coat to protect the natural nail. This layer also helps the transfer foil stick better.
Cure the base coat under a UV or LED lamp according to the product's instructions.
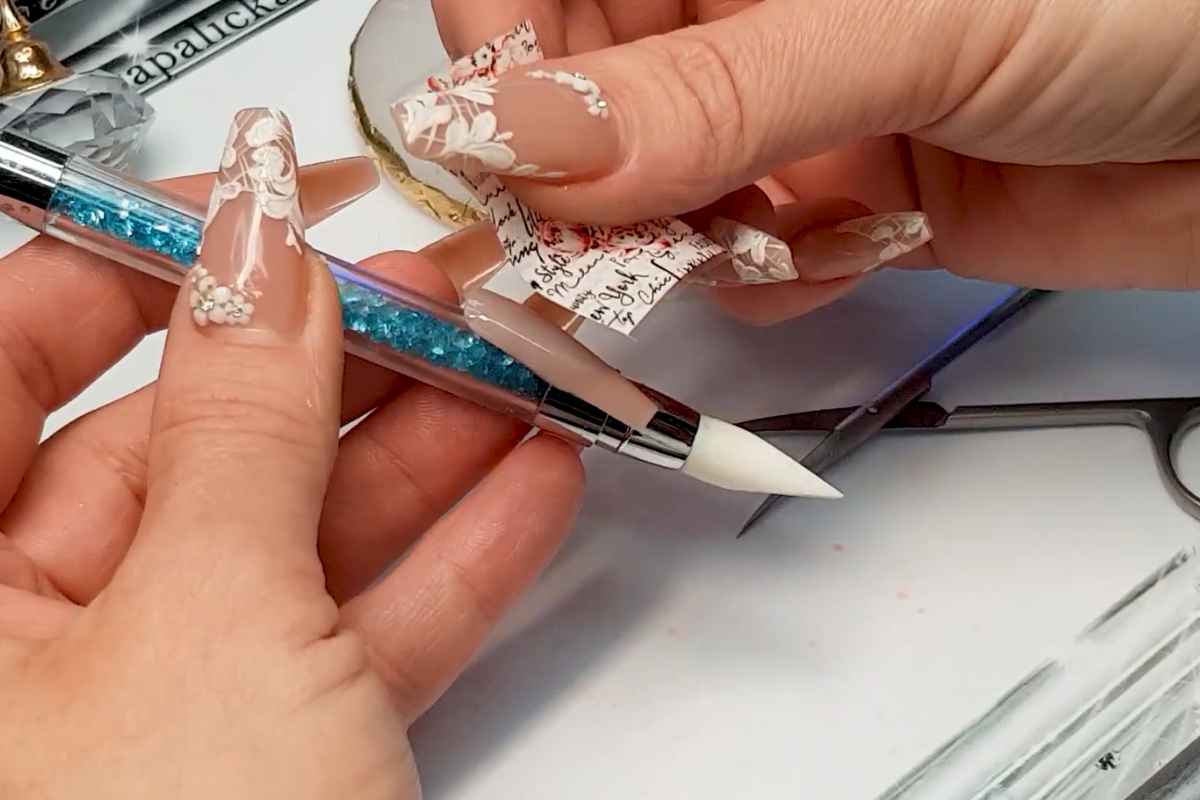
Step 3: Apply Foil Adhesive
Next, apply a thin layer of foil adhesive over the base coat. This adhesive will allow the foil transfer to stick seamlessly to the nail.
Let the adhesive become tacky, but not too dry, as this is crucial for getting a crisp and clean design.
Step 4: Transfer the Foil
Take a piece of full coverage transfer foil that fits your nail size and place it over the nail, with the design side facing down.
Gently press and rub the foil to ensure it adheres completely to the adhesive layer. Slowly peel back the foil to reveal the beautiful pattern transferred onto your nail.
This step creates the foundation of your vintage rose nail art.
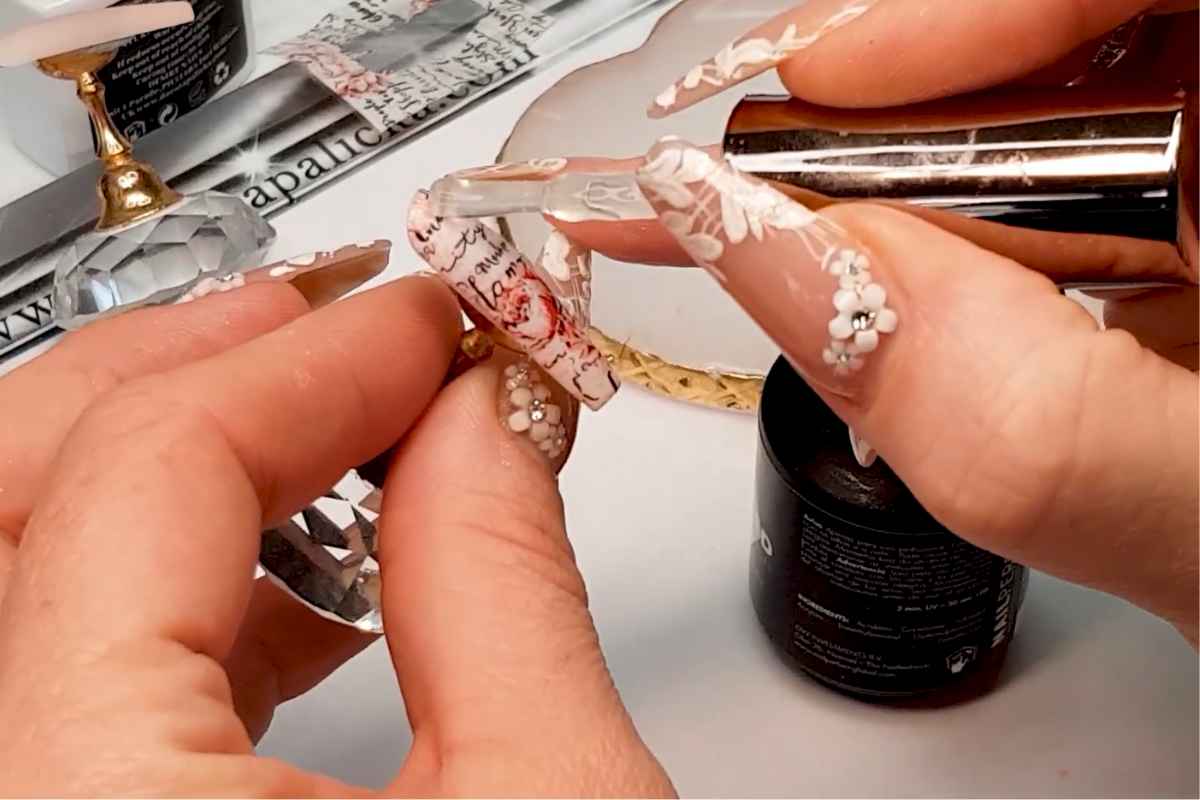
Step 5: Seal the Design
Once the foil is applied, it's time to lock in the design. Apply a top coat over the foil to protect it and give your nails a glossy finish.
Cure the top coat under the UV or LED lamp to ensure that the design stays in place. This layer will also enhance the longevity of your nail art.
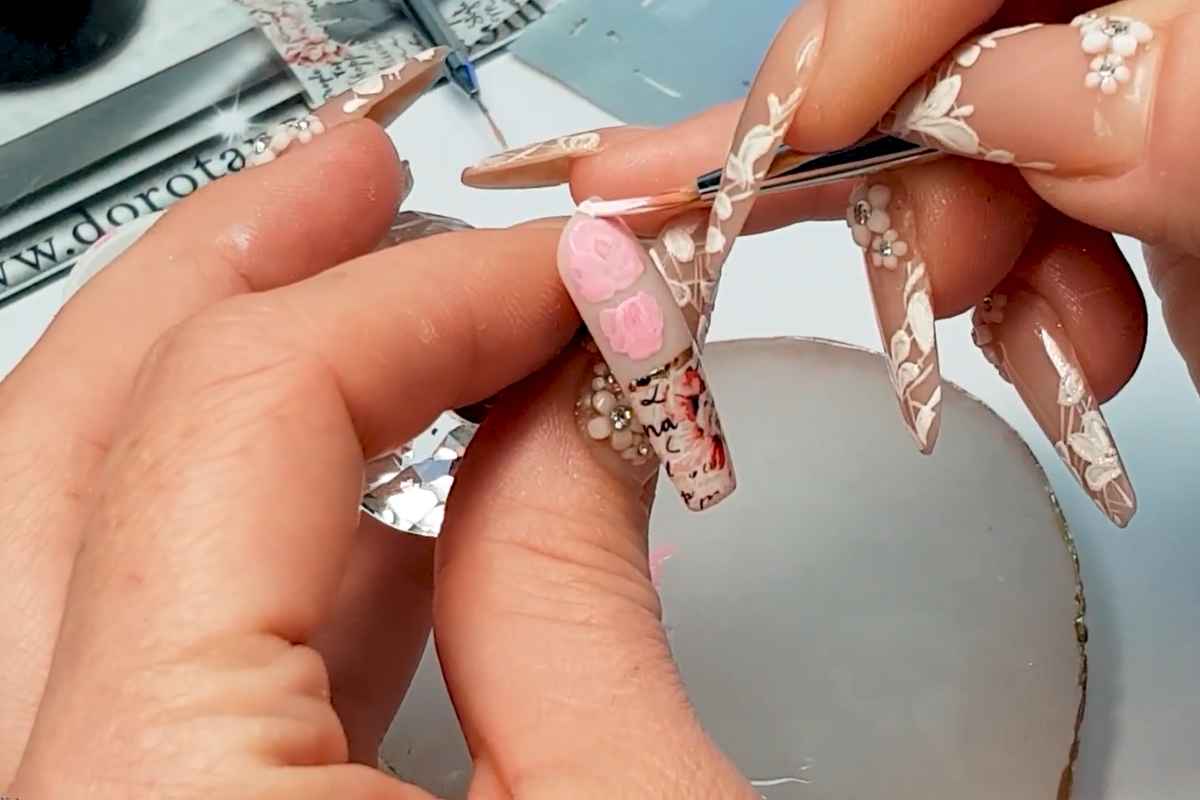
Step 6: Add Finishing Touches
For a truly stunning vintage look, consider adding small embellishments or hand-painted details.
Tiny pearls, crystals, or delicate floral accents can enhance the vintage rose design and create a more three-dimensional effect. This step is optional but can elevate the design for special occasions.
Tips for Perfect Vintage Rose Nail Art
Here are a few tips to ensure you achieve the best results when creating vintage rose nail art using full coverage transfer foil:
Choose the Right Foil: Opt for a floral-patterned foil or one with soft pastel tones to capture the vintage aesthetic. Bold, metallic foils might not evoke the same delicate vintage charm.
Avoid Overloading the Design: Keep the design simple and elegant. Over-crowding the nail with too many embellishments or extra layers may take away from the beauty of the vintage rose pattern.
Perfect Your Foil Application: If you're new to using transfer foils, practice on a spare nail tip or wheel to get a feel for the technique. This will help you avoid mistakes and get more precise with your designs.
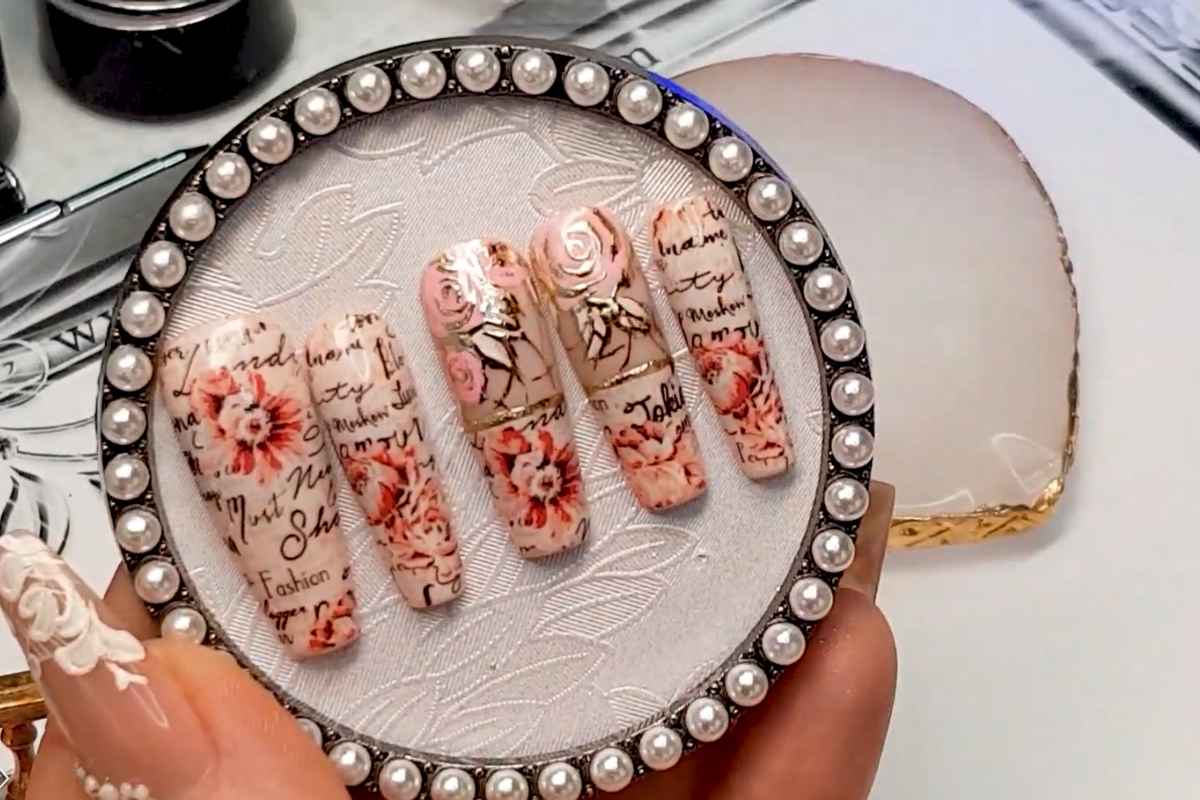
Why Full Coverage Transfer Foil Works for Vintage Rose Nail Art
The key to creating stunning vintage rose nail art lies in the use of full coverage transfer foil.
This technique allows you to achieve intricate designs without the need for hand-painting, saving time while still delivering a high-end finish.
The metallic shine of the foil, combined with the delicate floral patterns, captures the essence of vintage elegance.
Dorota Palicka Nails has revolutionized this technique by showcasing how full coverage transfer foil can transform even the simplest nail into a work of art.
Her tutorials and insights have made it easier for both beginners and professionals to master the art of foil transfer and create designs that reflect their personal style.
Add a Touch of Classic Beauty to Your Look
Incorporating vintage rose nail art into your nail routine can elevate your style and add a touch of classic beauty to your look.
The full coverage transfer foil technique makes it easy to achieve intricate designs without the need for excessive effort.
By following the steps outlined in this article and practicing with tips from Dorota Palicka Nails, you can create flawless vintage rose nails that are both chic and timeless.
If you're looking for more inspiration and advanced techniques, be sure to check out Dorota Palicka Nails' tutorials, where she shares her expert tips and tricks for mastering the art of nail foil transfer.
Whether you're a seasoned nail artist or a beginner, her tutorials are a valuable resource to help you enhance your skills and create stunning nail art designs.
Enjoy The Video Tutorial

Source: Dorota Palicka Nails
Did you find this post useful or inspiring? Save THIS PIN to your Beauty Board on Pinterest! 😊
![]()
You may also like