
Abstract Butterfly Wing Nail Art with Blooming Gel: A Step-by-Step Guide
17/05/2025 · Updated on: 15/05/2025

Nail art continues to captivate the beauty world with its endless possibilities, and one design that never goes out of style is the butterfly wing pattern.
Its delicate structure and vibrant colors symbolize freedom and transformation, making it a favorite among those seeking to infuse their nails with a bit of nature's elegance.
In this nail art tutorial, Dorota Palicka demonstrates how to create stunning abstract butterfly wing designs using blooming gel.
This technique creates soft, flowing patterns that replicate the gradients and textures found in butterfly wings.
Whether you're a beginner or a seasoned pro, this guide will help you master this captivating design.
What is Blooming Gel?
Blooming gel is a unique product in the world of nail art. Unlike traditional gels, which stay in place when applied, blooming gel spreads upon contact with other colors, creating a soft, gradient effect.
This spreading quality makes it perfect for watercolor-style designs like the abstract butterfly wings we're going to create today.
The gel allows colors to blend seamlessly, producing a beautiful, delicate look. It's an essential product for any nail artist looking to experiment with gradient patterns and abstract nail art designs.

Materials You’ll Need for Abstract Butterfly Wing Nail Art
Before starting your nail art journey, gather the following tools and materials for this butterfly wing nail design:
Blooming Gel
Gel polishes in multiple colors (we recommend pastel shades, but feel free to experiment with vibrant hues)
Nail Art Brushes
UV/LED Lamp for curing the gel
Top Coat
Step-by-Step Guide: Creating Abstract Butterfly Wings with Blooming Gel
In this tutorial, Dorota Palicka takes you through the entire process, showing you how to transform your nails into a canvas for this abstract design.
The steps are straightforward, ensuring even those new to nail art can successfully recreate this stunning look. Let's dive into the process.
1. Prepare Your Nails
Start by preparing the nails. Make sure they are free from oils and dust. A clean nail surface is crucial for the design to adhere properly.
Apply a base coat and cure it under a UV/LED lamp for the required amount of time to ensure a smooth foundation for your art.
2. Apply Blooming Gel
Once your base coat is dry, apply a thin layer of blooming gel. This gel will serve as the medium that allows your gel colors to spread and blend seamlessly.
Cure the blooming gel under your UV/LED lamp as instructed. The key here is to ensure an even layer that isn't too thick, as this can affect the blooming effect.
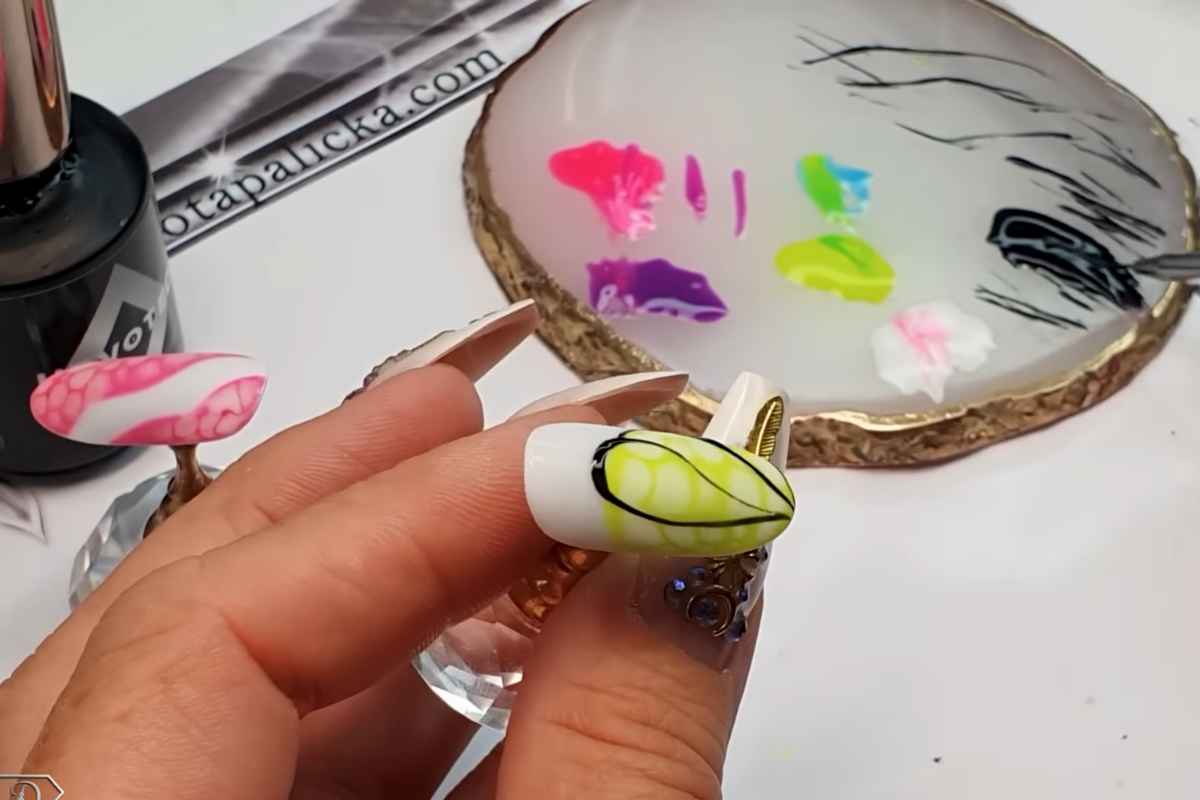
3. Start with the Colors
Using your nail art brush, apply gel polish in your desired colors onto the blooming gel. As the colors are applied, they will begin to spread, creating soft, abstract shapes.
To create butterfly wing patterns, use light strokes of contrasting colors, layering them to create depth and texture. Experiment with blending the colors to mimic the natural gradient patterns of butterfly wings.
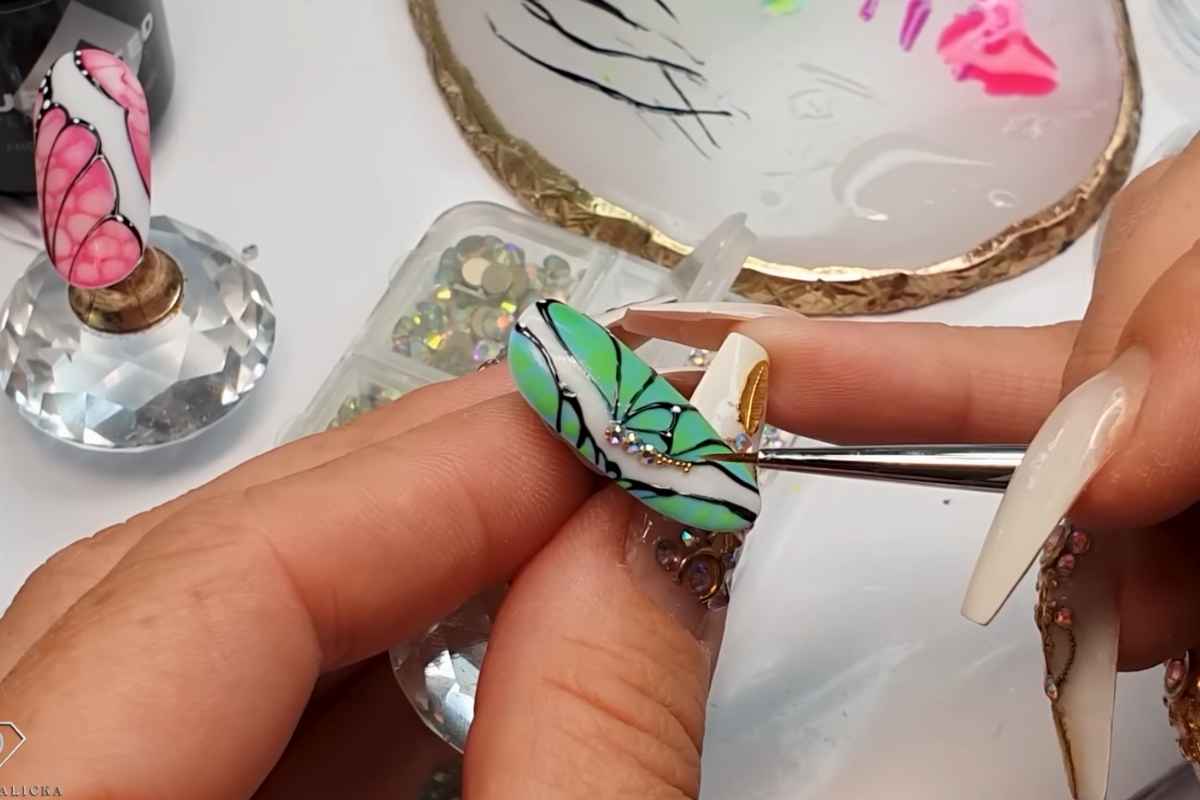
4. Refining Your Design
As the blooming gel does its job and the colors start to spread, you may want to refine certain areas. Use the nail art brush to adjust the edges of the design, adding more color where necessary.
This is your opportunity to get creative with the abstract shapes and intricate designs that define butterfly wings. Take your time here—creating a beautiful butterfly design is about patience and control.
5. Cure the Design
Once you're happy with your abstract butterfly design, cure your nails under a UV/LED lamp to set the gel. This step is crucial to ensure the design holds its form and remains durable.
6. Finish with a Top Coat
Finally, apply a top coat to seal in the design and add a layer of shine. Cure the top coat under the lamp one last time. This will lock in the butterfly wing design and provide a glossy finish.
Tips for a Perfect Butterfly Wing Design
Color Combinations Matter: Feel free to get creative with your color choices. While soft pastels are often used for butterfly wings, bold and vibrant colors can also create stunning effects. Consider using metallic hues or shimmering gel polishes to add extra dimension to your design.
Control the Blooming Effect: The amount of blooming gel you use can greatly affect the final look. If you want more control over how the colors spread, apply a thinner layer of blooming gel. For a more fluid, blended effect, you can apply a slightly thicker layer.
Experiment with Layers: The beauty of abstract nail designs is the ability to layer colors and textures. You can create different levels of depth by adding additional layers of gel polish over the first one.
Refine Your Design: Don’t be afraid to go back and touch up areas that need more definition. Use your nail art brush to define edges and create fine lines that give your abstract butterfly wings more structure.
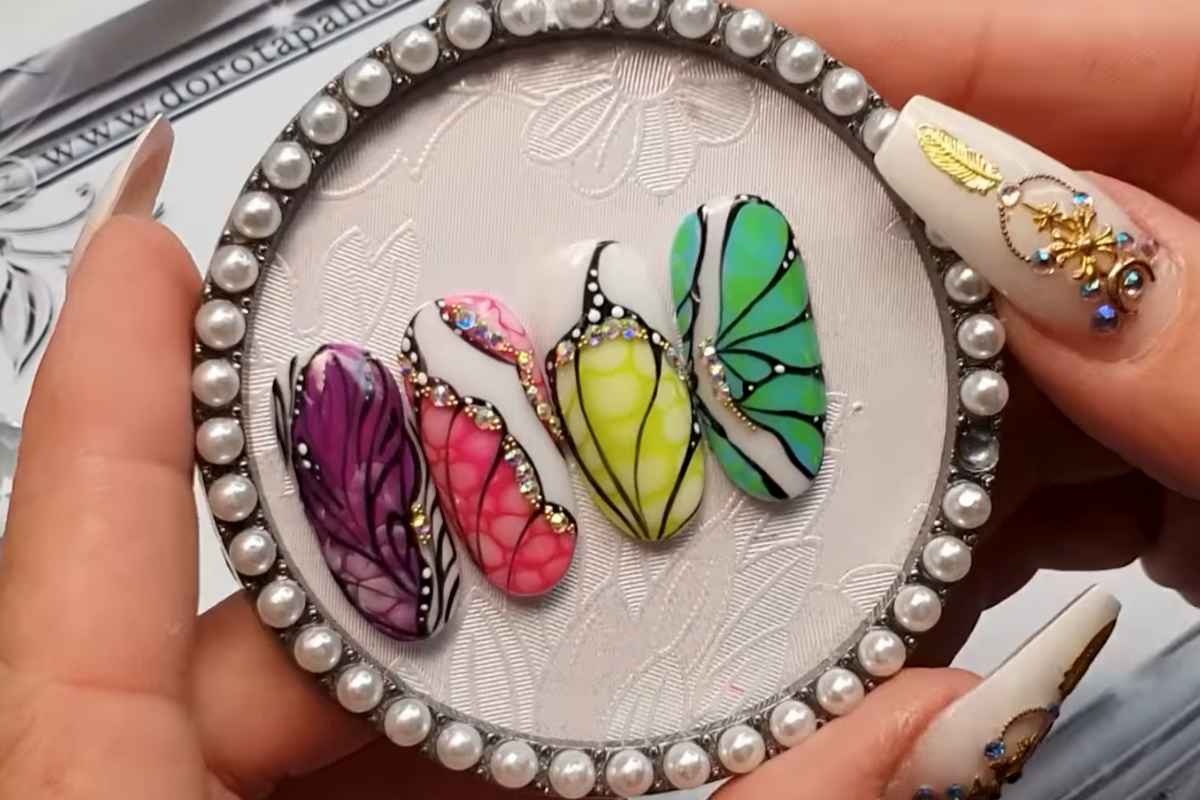
Why Try Abstract Butterfly Wing Nail Art?
This butterfly wing design is not only beautiful but also versatile. It can be adapted to fit different occasions, from everyday wear to special events like spring or summer parties.
Plus, the abstract nature of the design means it’s perfect for anyone who loves experimenting with colors and textures.
This nail art technique also allows you to explore creative freedom—you’re not restricted by a specific pattern or style, making it a fun and rewarding challenge for nail art enthusiasts.
Embrace Your Creativity with Blooming Gel Nail Art
Creating abstract butterfly wing nail art using blooming gel is a fun and rewarding experience that allows you to explore your nail art creativity.
With Dorota Palicka’s guidance, you can master the technique and create stunning, professional-level designs.
Whether you're a beginner or an expert, this technique is sure to add a beautiful and nature-inspired touch to your nail art repertoire.
Enjoy The Video Tutorial

Source: Dorota Palicka Nails
Did you find this post useful or inspiring? Save THIS PIN to your Beauty Board on Pinterest! 😊

You may also like